
[ad_1]
Step-by-Step Guide on Creating a Business Gmail Account
In today’s digital age, having a professional email account is crucial for any business. A Gmail account is not only reliable and easy to use, but it also offers a range of features that can help streamline your communication and enhance productivity. If you are looking to create a business Gmail account, follow this step-by-step guide:
Step 1: Visit the Gmail Account Creation Page
To begin, open your web browser and navigate to the Gmail account creation page. You can simply search for “Gmail account creation” or type in “accounts.google.com/signup” in the address bar. Once you’re on the page, click on “Create account”.
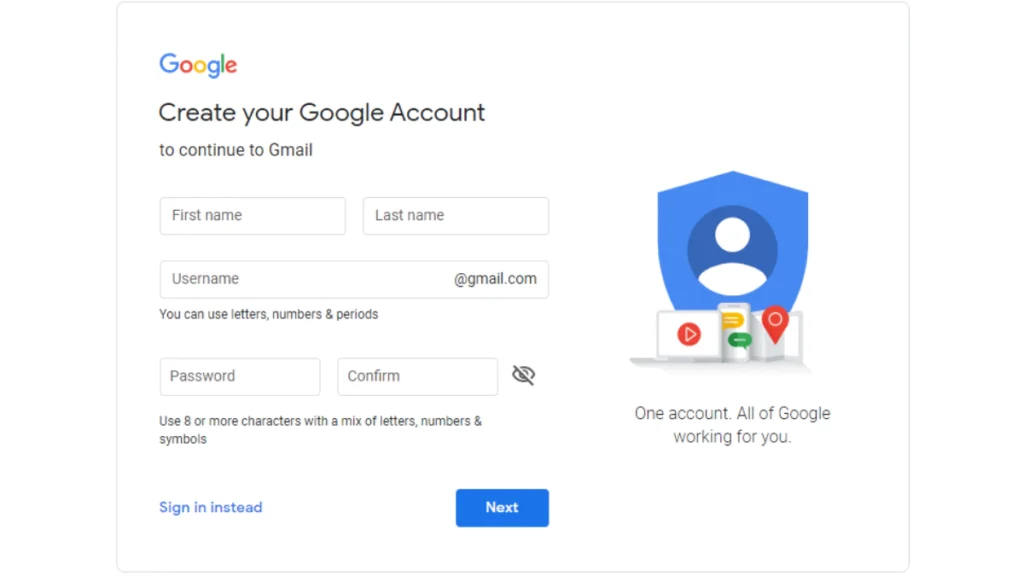
Step 2: Enter Your Business Details
On the account creation page, you will be asked to provide certain details to set up your business Gmail account. Start by entering your first and last name as well as the desired email address. Since this is a business account, it’s crucial to choose a professional email address that reflects your business name or brand.
Step 3: Create and Confirm Password
Next, create a strong password for your business Gmail account. It is advisable to use a mix of upper and lower case letters, numbers, and special characters to enhance security. After entering your password, re-enter it in the confirmation field to ensure accuracy.
Step 4: Verify Your Phone Number
To protect your account from unauthorized access, Google requires you to verify your phone number. Select your country from the drop-down menu and enter your phone number. You will receive a verification code via SMS, which you’ll have to enter on the account creation page.
Step 5: Recovery Options
Choose a recovery email address and additional recovery phone number. These recovery options will greatly assist you in case you forget your password or face any issues accessing your account. Make sure to select options that are easily accessible and secure.
Unlock the Power of Gmail for Your Business’s Communication Needs
Step 6: Agree to the Terms and Conditions
Read through the terms and conditions provided by Google and accept them by ticking the checkbox. It is essential to familiarize yourself with the terms to understand the privacy policies and the terms of service.
Step 7: Account Privacy
Google provides you with options for privacy settings. You can choose to make your account public or private. Assess your business needs and determine the appropriate setting. Privacy preferences can be modified later in the account settings.
Step 8: Completing the Setup
After accepting the terms and conditions and setting the privacy settings, click on the “Next Step” or similar button to proceed. Google will then guide you through a series of steps to personalize your account, such as adding a profile picture and setting up a signature.
Step 9: Familiarize Yourself with Gmail Features
Once your account is set up, take some time to familiarize yourself with the various features Gmail has to offer. Explore the different tabs, such as Primary, Social, and Promotions, to effectively manage and prioritize your emails. Learn how to create folders, apply filters, and set up automatic responses.
Step 10: Customize Your Account Settings
To optimize your business Gmail experience, customize your account settings. Access the settings menu by clicking on the cogwheel icon in the top-right corner of the Gmail interface. Explore options such as Gmail themes, inbox layout, priority inbox, and email forwarding to tailor your account to your specific needs.
In conclusion, creating a business Gmail account is a simple and straightforward process. By following this step-by-step guide, you can create a professional email address that aligns with your business’s branding and enhances your communication capabilities. Take advantage of the various features and customization options available in Gmail to establish a productive and efficient email workflow for your business.
[ad_2]