[ad_1]
Step-by-step guide: How to create your very own Google Ads account
Google Ads is a powerful online advertising platform that allows businesses to reach their target audience and promote their products or services. If you are new to Google Ads and would like to create your own account, this step-by-step guide will walk you through the process.
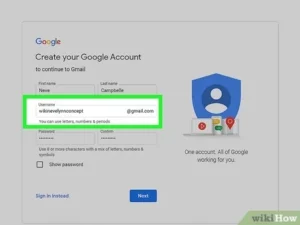
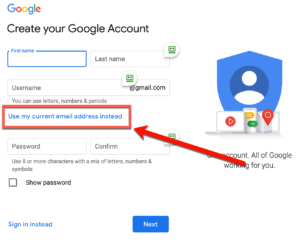
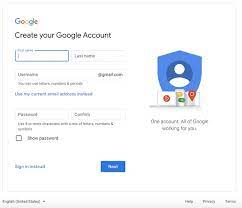
Step 1: Sign up for Google Ads
To begin, navigate to the Google Ads homepage by typing “Google Ads” into a search engine. Click on the top link that says “Google Ads – Get More Customers With Easy Online Advertising”. On the homepage, you can click on the “Start now” button to begin the sign-up process.
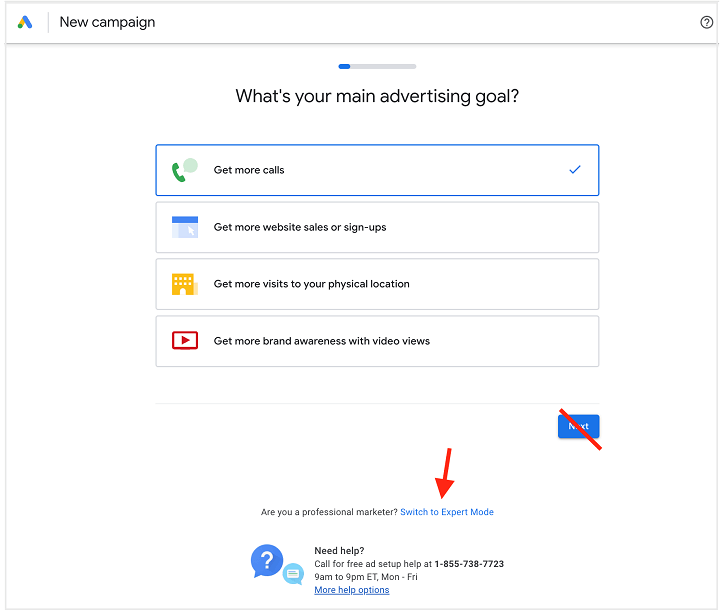
Step 2: Choose your advertising goals
Once you click on “Start now”, you will be prompted to choose your advertising goals. Google Ads offers several options such as driving website traffic, increasing sales, or generating leads. Select the goal that aligns with your business objectives, and then click on the “Next” button.
Step 3: Set up your campaign
In this step, you will need to provide some information about your business and your campaign. You will be asked to enter your website URL, create a campaign name, and select the geographic location where you want your ads to appear. Additionally, you will need to choose your campaign type, budget, and bid strategy. Take your time to carefully review and configure these settings, as they will determine the success of your ads. Once you are satisfied, click on the “Save and continue” button.
Step 4: Create your first ad group
After setting up your campaign, you will need to create your first ad group. An ad group contains a set of keywords and ads that target a specific audience. You will be prompted to set a bid for your ad group and create your first text ad. Make sure to create compelling and persuasive ads that will attract users and entice them to click on your ads. Once you have created your ad group, click on the “Save and continue” button.
Step-by-Step Guide to Creating a Google Ad Account for Your Business
Step 5: Set up billing
To run ads on Google Ads, you will need to provide billing information. Click on the “Add billing information” button, and you will be directed to a page where you can enter your payment details. You can choose from various payment methods such as credit card or bank account. Follow the prompts to complete the billing setup.
Step 6: Review your campaign settings
Before activating your campaign, review all the settings you have configured. Check the targeting options, bid strategy, and ad copy to ensure they are aligned with your objectives. If you need to make any changes, you can easily go back and edit your campaign settings. Once you are satisfied, click on the “Go to campaign” button to finalize the setup process.
Step 7: Optimize and monitor your campaign
Congratulations! You have successfully created your Google Ads account and launched your first campaign. However, the work does not stop here. It is crucial to continuously monitor and optimize your campaign to achieve the best results. Frequently review your ad performance, refine your keyword list, test different ad variations, and adjust your bids if necessary. Google Ads provides robust analytics tools to track the success of your campaign, so make sure to leverage these insights to improve your ads’ performance.
In conclusion, creating your own Google Ads account is a straightforward process that can significantly benefit your business. By following this step-by-step guide, you will be able to set up your account, create compelling ads, and reach your target audience effectively. Remember to continuously monitor and optimize your campaign to maximize your advertising investment and achieve your business goals.
[ad_2]